
Editing videos. Seems like a daunting task, doesn’t it? There’s a lot to keep in mind and a learning curve to overcome. You’ll have to be part of the process in helping your child edit their first video, but we’re here to help. Post-production is where the magic happens and it’s a very special process and a very rewarding one when your child puts all their footage together to make content with it. They’ll be very proud of themselves, and that’s a reward in and of itself.
Let’s get started.
Which video editor to use
There are a lot of good ones out there that are free. You don’t have to spend big bucks on quality editing. We’ve decided to recommend OpenShot Video Editor. That’s because we don’t want to bar you from entry in what could just be a little project. Most of the editors out there are for serious editors. You can always consider them if your child decides they really want to get into video editing.
The great thing about OpenShot Video Editor is that its open source meaning it’s completely free. There’s no push to get a subscription or pay for all the features. You can donate to the team behind it if you want to and it’s not required. It will work on any computer operating software: your Windows PC, Mac, or even a Linux-based computer. Download it now.
Make use of the simple guide
We’ll be taking you through the basics of OpenShot, but for future reference here’s the OpenShot User Guide, which will help you through many of the more complicated aspects of this powerful but beginner-friendly program.
Get started by importing your footage
Help your child upload all their footage from the smartphone photo album (there’s normally an album called “videos”). How you get them onto your computer depends on the phone you’re using. It’s admittedly the trickiest to do with an Android phone and an Apple Mac machine, but this guide will assist you. For all other combinations of phones and computers, it’s a relatively straightforward process. For instance, if you have an iPhone and a Mac, your iCloud will automatically sync your photo (video) album for you. Then you just need to select all the footage your child took and drag it from the Mac’s photo album onto a desktop folder, titled something like “The Kid’s First Content Project”. If you want to get fancy, you can call it: “Project: Kid Kubrick”. For importing Android phone videos to a PC, you just need to connect your phone with the cable that came with it, and plug it into your PC. For more information on how to do this, check out this demonstration video.
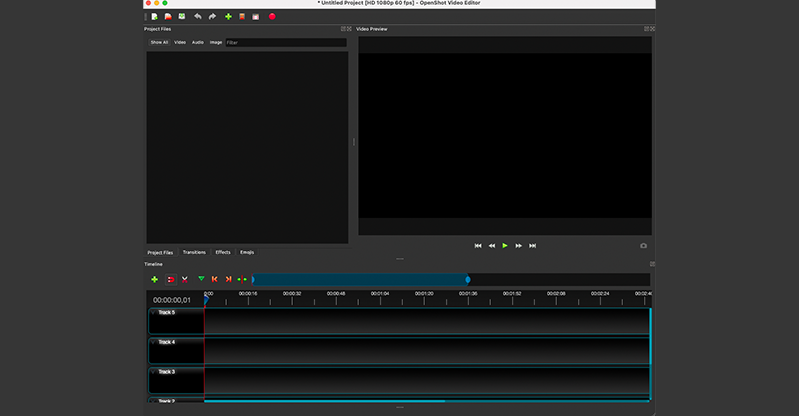
Getting familiar with the workspace
OpenShot is one of the easier editing programs for beginners. That makes it perfect for your kid— once you’ve helped them get settled in, of course! After installing and opening the app, you will get to the editing screen.
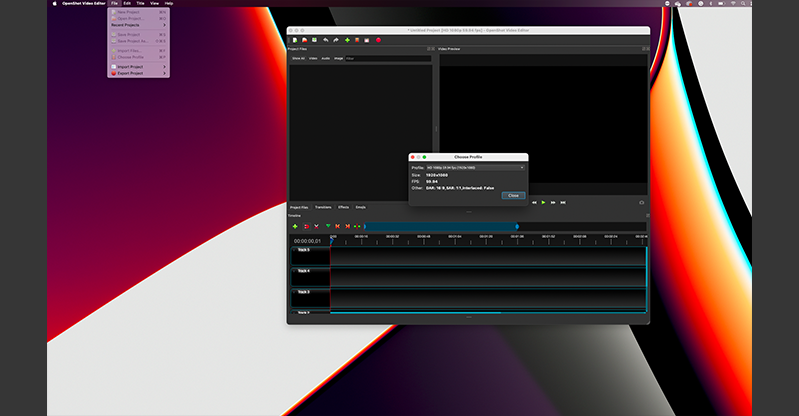
The first thing you want to do is go to the menu and select “Choose profile.” Many camera phones shoot in 4k 60 fps (frames per second), but let’s go for a standard 1080p (full HD) at 60 fps. Select it and that’ll be what your video output will be regardless of the footage resolution.
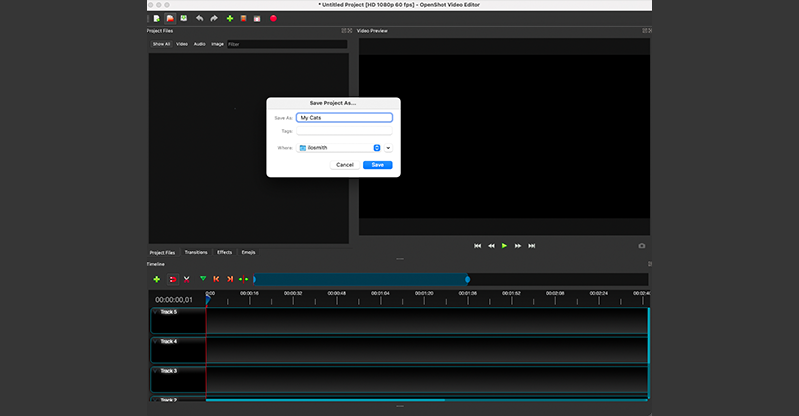
We suggest saving your project now under a specific name. Go to “File”, then click on “Save Project as…”.
Getting started: importing the media files
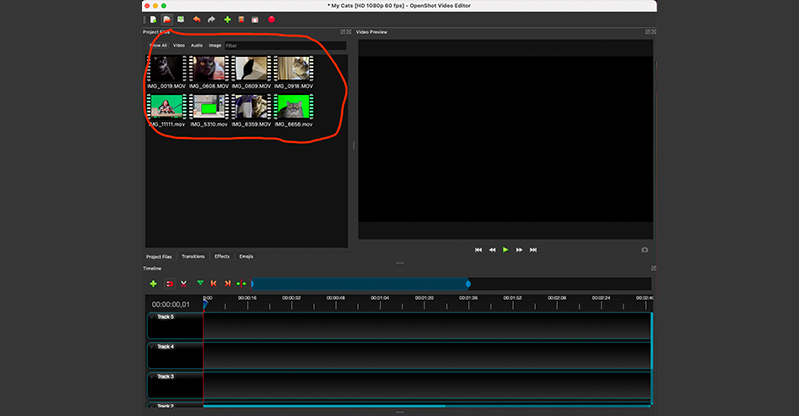
Next, we’re going to import our media into OpenShot, so it’s available to use for editing. Simply click on the green plus sign in the top left-hand corner to open the import function. It will present you with options on where to find the relevant video files. So, go to the file folder you created for your child’s footage, then drag a square box with the left mouse button and cover all the files. Once done, click “Open”.
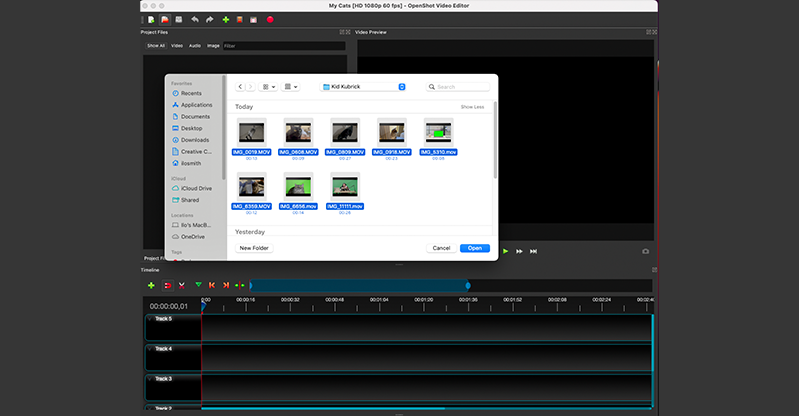
You’ll be presented with the exported video files on this screen:
The basics of editing video
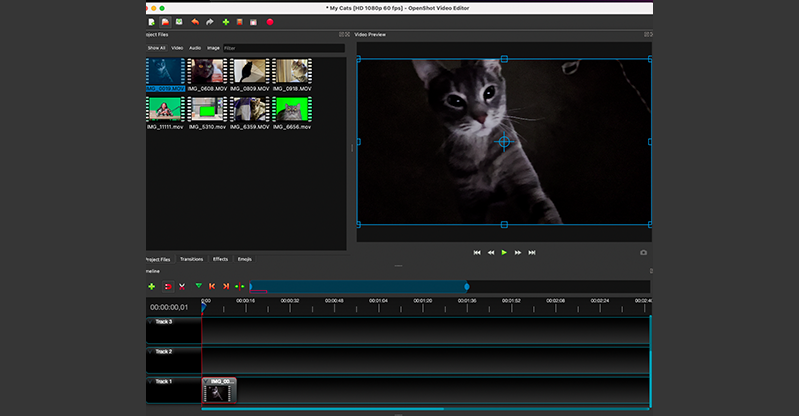
Now your footage is available within the editing program. How do you get started on editing? What you do is scroll down to Track 1, which is your predominant track. Click on the video file you want to add to the timeline and drag it with the left mouse button to the timeline (Track 1).
Anything over the track, say in track 2, which overlaps with Track 1, will take priority. This is important. You may want to use the overlap for transitional purposes, but there is a better way to transition. Drag the next clip (in the order of the script we discussed in Part II of the video content blog).
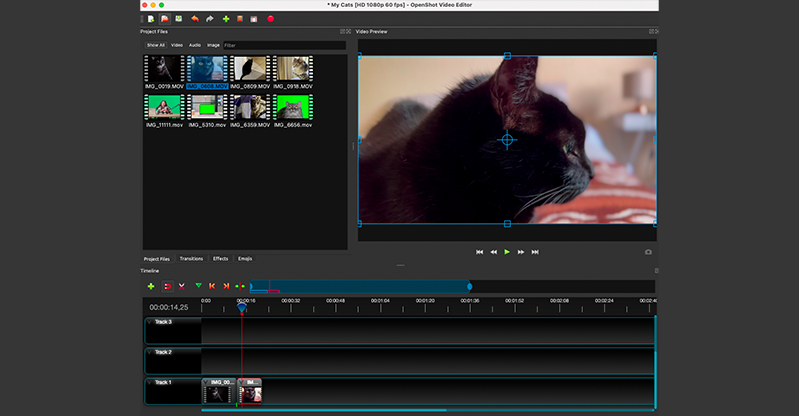
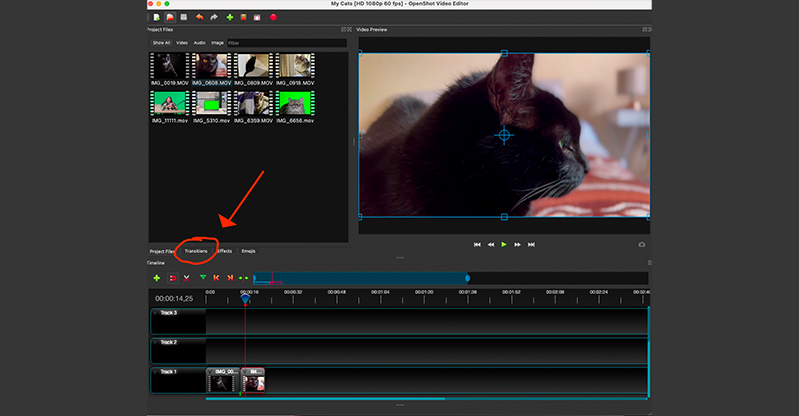
Then click on Transitions.
We’ll have a lot of options. Go ahead and choose one, but we recommend a Cross. Pick the one that suits your fancy best.
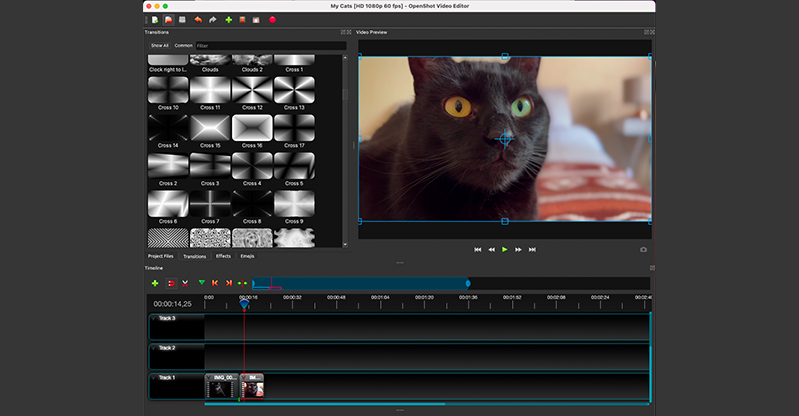
Drag and place your cross transition (or whichever transition you use, shorten it if necessary by going to the sides of it and adjusting the length with your mouse. Ensure that both video files are touching each other in the transition.
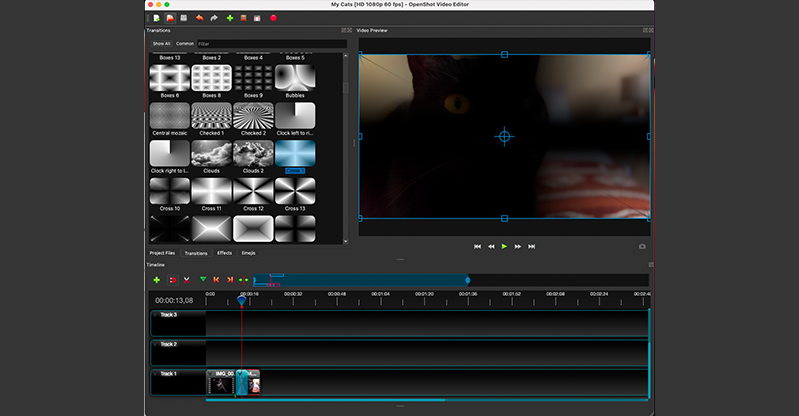
As you can see in the above picture, it’s in the process of transitioning from one clip to another. You’ll mainly be using this for a change in scenes rather than clips/shots taking place within the same scene. For example, your child has shot five clips in the living room depicting kids playing on a console gaming system and his clips are in different angles. One, for instance, is focused on one boy’s face as he stares at the TV intensely. His next clip is a shot from behind both boys in a wide angle with the TV in the background. You wouldn’t be using transitions here and would just keep the two clips on the timeline (Track 1) next to each other. But then we have a clip of dad working in the study on something very important, this would constitute a change of scene so this is where you’d use a transition between the scenes.
In my case, I’m transitioning between two unrelated clips of my cats, so in a sense, it’s a change of scene.
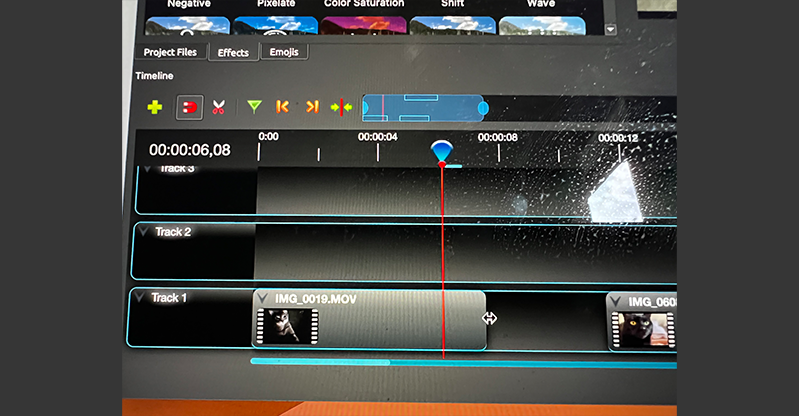
Shortening clips
When recording video there are normally bits at the beginning and at the end that are unwanted. Or, maybe there’s just a particular section of the video clip you want. The simplest way to edit this is to click on the clip, go to the left or right side, and on the border move the clip inwards on itself. This will automatically remove the footage up to that point, but here’s the thing: it’s non-destructible. This means if you decide you want a bit more of the footage for that clip, you can move the border outwards.
It’s impossible to show the cursor while doing a screen grab, so our iPhone photo will have to do.
With OpenShot, you may find it difficult to get that cursor as it appears above (in the dual opposite arrow). If so, move the transition and the other footage out of the way. Sure, it’s probably easier to get it right the first time, but since your child will be doing tweaks throughout their editing process, readjustments will happen. If the cursor doesn’t respond as it should, simply move the other connected elements out of the way — then it will be easier.
You’ll now be able to lengthen or shorten your clip (lengthening is only possible if you’ve previously shortened it). You can do this from both sides to get the specific section of the clip you want.
For instance, if your child starts shooting with actors holding positions before they begin acting, they can shorten the clip past that section, so the clip starts when the actual action does. Similarly, they may have the shot they want, but the actors have continued to act past the point he or they wanted and shortening from the end solves this problem.
But what if the footage has specific sections your child wants that are separated by parts of the clip they don’t want? Simple — use the Blade feature. The Blade feature slices the clip being edited. You would slice just before and after the specific part of the clip you want, then you would do the same thing with the other section of the clip. Finally, you’d delete the erroneous sections from the clip. You can do this by either pressing “Delete” or by right-clicking on the file and selecting the option to delete it at the bottom.
See below for how to select and snip with the scissors tool:
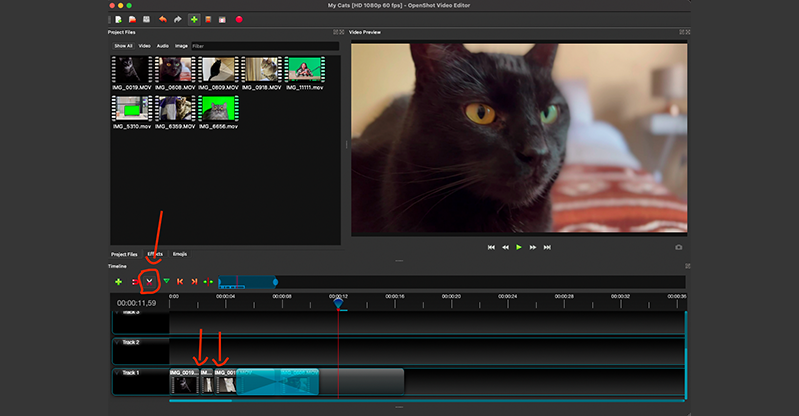
Right, so we click on the scissors as shown above, and then hover the cursor slightly above the footage we want to snip. We snip on both ends and remove the parts of the clip we don’t want.
So far, we’ve covered how to (a) get a decent, free video editing tool for Windows, Mac, and Linux; (b) how to import the footage your child has recorded onto the computer and then import it onto OpenShot; (c) how to bring the various clips onto the timeline and place them; (d) do transitions between them; (e) shorten clips (or lengthen them again); and (f) slice the parts you want from a specific clip and get rid of the parts you don’t want.
Those are the fundamentals of putting together a piece of content — through the placement and editing of both clips and within clips — to create a single video content piece.
Now it’s time to teach you something very cool. Remember how we advised you to get a small portable green screen to use for some of the recording? Well now, we’re going to teach you how to implement that footage.
Green screen: how to use the chroma key function
Chroma key (or simply “keying”) is the term for the effect used to remove the relevant color — usually green, because it complements everything, though blue is sometimes used. What you’re going to do now is place the footage using the green screen on Track 2. This is because all the Tracks above one will take priority in being shown on the screen according to the hierarchy of their number.
(Note: you can use multiple green screen footage in the various tracks to show, for instance, the same actor on screen at the same time — say the script calls for triplets… the actor would be standing in the same scene in different positions for each recording. Then, you could take each green screen shot and layer them from Track 2 and up. Never do this on Track 1. Track 1 is where you show your actual background because the Tracks above 1 take priority AND since the chroma key removes the green background, you will have a clip with three people who all happen to be the same actor, in the same scene.)
Above, we’ve just clicked and dragged our green screen footage onto Track 2. Next, we’re going to click on the Effects button and then click on the Chroma Key, then we’ll drag it onto our green screen footage. You’ll notice a little “G” icon appear.
Now, this is where things get finicky. Chroma keying on this particular open-source editing software is a little tricky. If you happen to have a Mac, iMovie is actually really good for chroma keying, and it’s also free.
(It’s an Apple App that you can download off the Apple App store completely free with no in-app purchases or licensing required. Using the basic principles as stated earlier, you could use it as your alternative to OpenShot. It is, however, only available on MacOS computers. Windows Users would be looking at paid/licensed software, like the excellent PowerDirector, which is admittedly a bit hefty pricewise. For a paid-for prosumer-level editing program on Mac, you can’t go wrong with Final Cut Pro — which does have a bit of a learning curve, but it is built beautifully for the Mac operating system — especially now that it is native to Apple Silicon. However, if you’d rather save your money and go through the sometimes-tricky process of chroma keying on OpenShot, read on.)
If you’re reluctant to pay for or unable to get these particular editing programs, consider them in the future if your child turns out to be an editing and video content producing wizard. For now though, we’ll stick with OpenShot.
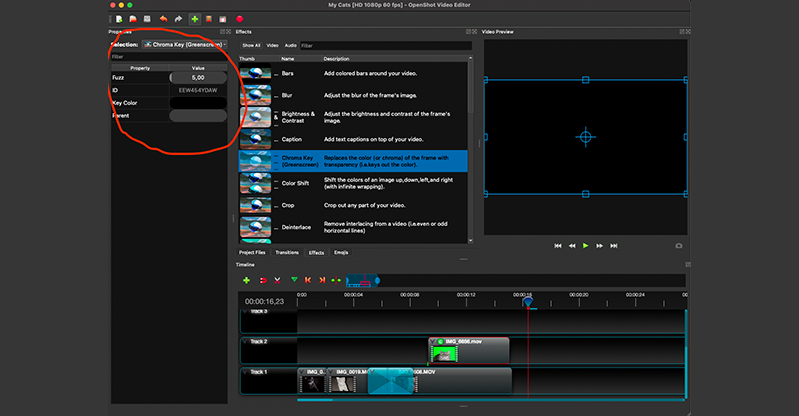
Right-click on the “G”, then select “properties”. It’ll open a side panel you’ll see in the above picture. You now want to click on “Key Color” with the right mouse button. It’ll open up the below:
You want to pick the key color to be removed that matches your green screen (remember when we said lighting was important in Part III for green screening? That’s because you want the shade of green to appear uniform throughout the shot so it’s easier for the chroma key to get the exact color.)
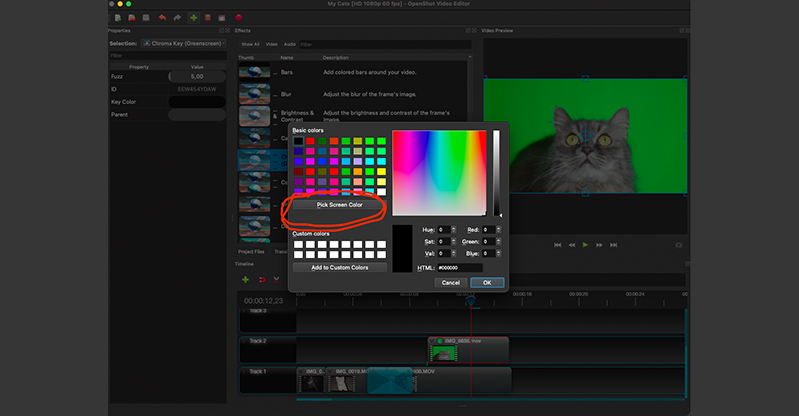
Click on “pick screen color” and move the droplet icon onto the right-hand side, where your preview footage is. Click on the green there (Please note: Macs do seem to have a problem with exiting the dialog box, in which case, you’re going to have to use the color picked on the RGB window in the dialog box. Pick the shade of green as close as you can to the actual one).
Now, when that’s done, click “OK”. You may or may not notice some of the green missing, and the subject appearing in the background. On the left panel, the properties for the chroma key should still be open. Click on “fuzz” and adjust it. Go as far to the right as you need to. You’ll now notice more and more of the background appearing.
Here’s a neat trick for you: you can add another chroma key by repeating the same process you did the first time. Now there will be two “G”s. With the second “G”, repeat the process of chroma keying, selecting the shade of green not picked up by the first “G”. Again, up the “fuzz” and it should be gone!
Now that you’ve done your first chroma keying exercise with your child, they’ll hopefully be able to do it on their own in the future.
By now you’ve probably noticed that OpenShot can get frustratingly cluttered with its UI. If, at any time you want to clean things up, go to the top bar, select “View”, then “Views”, and finally select “Simple View”. It will restore order to your universe!
Now let’s get to titles.

Titles for your video piece
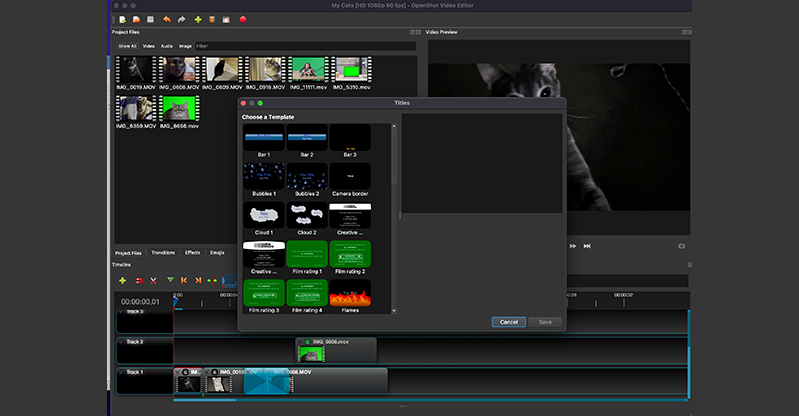
What’s content without a cool title? Fortunately, OpenShot offers several. To access them, simply click on “Title” in the top bar. It will open up this screen:
Now ask your kid what they’d like to use. Use as many as they want. For instance, the “Ratings” titles can be used as an opener, followed by a title for the “production company” (Kid Kubrick Productions?), and finally the title of the actual content video.
We’re just going with one Title for this demonstration, however.
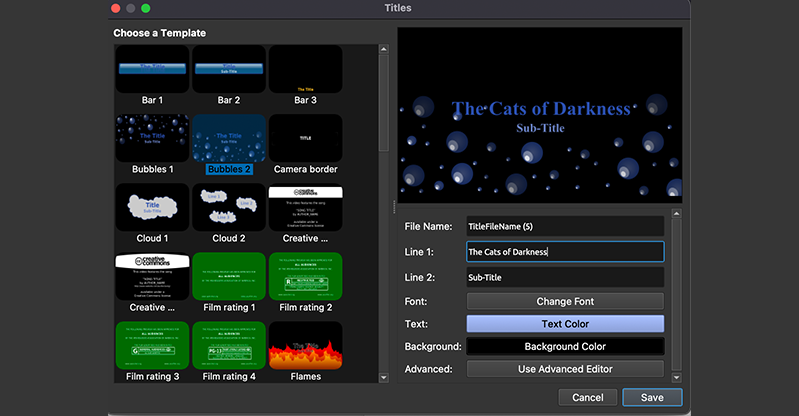
You’ll be able to pick your title here — select the one you (or more specifically, your kid) wants, and then you’ll be allowed to do some editing. In the various lines, type your title and subtitle (or leave the subtitle blank if you want). You’ll see in the above pic that you can also change the font, text color, and background color. Do what suits the style of your production best. We’re going to go with an ironic title, almost like something from a Halloween special because our cats are so sweet.
Once you’ve done your editing, click “Save”. It will now appear in your project files. From here, you can simply drag it down into Track 1, presumably from the beginning.
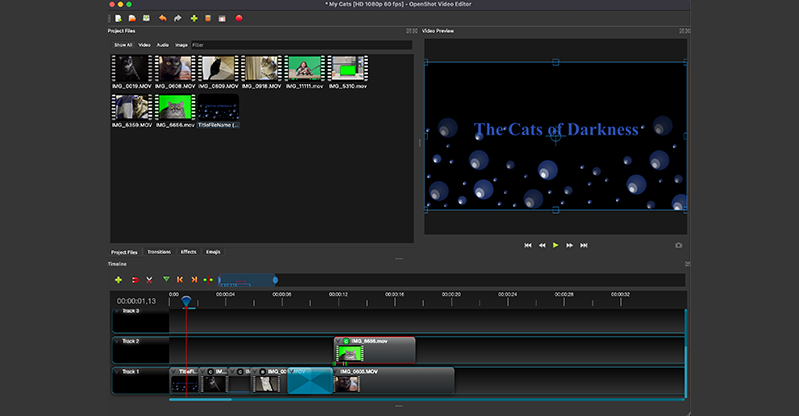
As you can see, we’ve added ours in nicely to the beginning of the timeline. You have the option of having it overlap with other clips too, if you want to. And, of course, you can go into Titles again and select an ending title like, “The End”. You can even do a cast and production crew scrawl.
Now just one last thing:
Saving and exporting your project. Simply go to File in the top bar, and select “Export Project”, which will bring up three options but just focus on “Export Video”. It will bring up this screen:
You can leave the settings as they are. They should be set to work for all devices and upload onto most social media platforms. Obviously, if you’re shooting something for TikTok, Facebook Stories, or Instagram Stories, your child would have done the shoot vertically. The settings should match the footage dimensions. Now is your chance to rename your video if you want to (it will otherwise automatically go with the project name).
Click “Export Video” in the bottom right-hand corner, and OpenShot will start rendering the video file. Take note of the output directory. Though if you know the name of your file, you can always just search for it using your operating system’s search function. Remember to include .MP4 after the name, as that’s the default video file type it will save to.
Once it’s completed rendering — which could take a minute or two up to 10 or 20 minutes depending on how large the video content is and how layered the tracks are — you can enjoy watching your kid’s content together!
Upload it onto a private channel on YouTube and share your kids’ video with all your family and friends!
The End
You now know all the basics for how to put together a series of clips into post-production, order them, use transitions, titles, and even chroma key. There are other special effects to try out too. So, we recommend that you and your child experiment! It’s one of the best ways to learn, and if you get stuck with any of the more complex aspects of OpenShot, you can always refer back to their guide — link at the beginning of this article.
But if you want to give your child the opportunity to truly excel as a video creator, the best option is to enroll them into Tekkie Uni’s Video Creator course. It’s a live, online learning experience where they’ll get to interact with dedicated instructors and enthusiastic classmates. They’ll enjoy the thrill of making their very own content under the guidance of our expert teachers using especially licensed pro software and very creative-inspiring footage for them to put together to tell their own exciting story!